SharePoint 2013 – Hardware needs
To run a SharePoint 2013 development environment, you need a machine with decent specifications. SharePoint 2013 needs at least 12 GB of RAM to run properly, and multiple cores to keep the stuff going. As my current laptop lacks this kind of specifications, but fortunately I currently have a MSDN Premium subscription, which includes a monthly credit of €75 for Windows Azure. Besides this credit, Microsoft made some MSDN specific images available, which give you a fly start because all the needed software is already installed (SQL Server, SharePoint, Visual Studio).
There is some information available on the web about these Visual Studio images, but I found it was a bit out of date, so I wrote my own install guide. I want to create a simple development environment for SharePoint 2013, so I choose to setup a single machine farm without an AD (so I do not need another AD machine).
Configuration steps
MSDN subscription with Azure
You need to create your VM in Azure with an account connected with MSDN. If you didn’t set up Azure with your MSDN account, start at https://msdn.microsoft.com/subscriptions/manage/ to start your Azure MSDN benefit.
Set up a Virtual Machine
If you already set up this account, or after you set it up, go to the Windows Azure Management portal.
Create a new machine

Click New - Compute - VM - From Gallery to create a new Virtual Machine in your Azure environment. A wizard will guide you through the process for a new VM.
Choose an Image
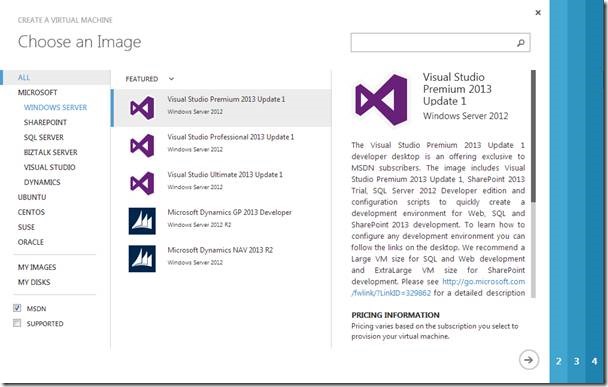
As a MSDN specific image is needed, check MSDN in the left bottom. Now you can create a VM based upon a specific Visual Studio version. Choose the MSDN version eligible to your MSDN subscription (or downscale, as the lighter the version is, the lower the needed disk space will be, and the lower the costs will be).
Virtual Machine configuration
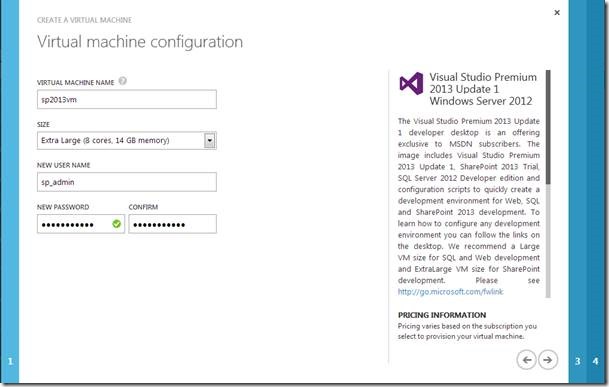
In this screen, you choose your computer name, administrator account name and password, and most importantly the size of the VM. Choose the Extra Large VM size.
Cloud configuration
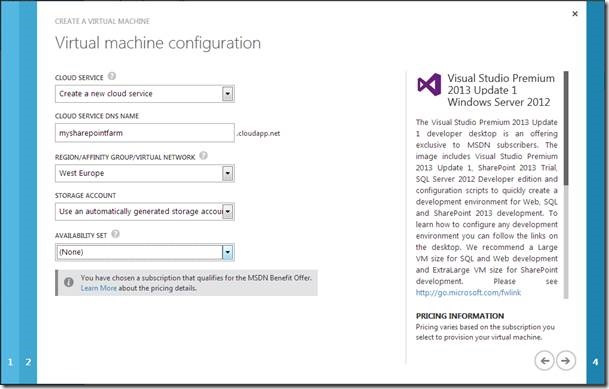
In the cloud configuration you specify the DNS name which you use to connect to the machine (RDP or HTTP). As this is my first VM in Azure, I created the cloud service and storage account automatically.
VM network configuration
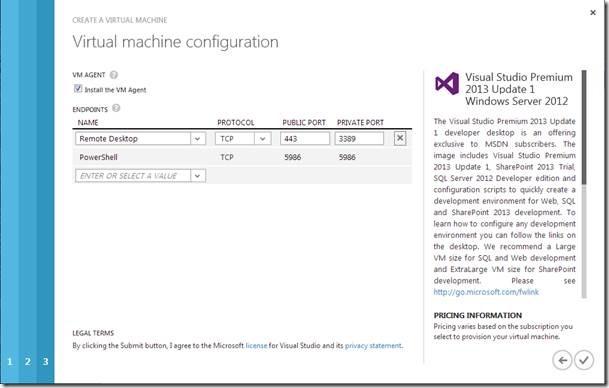
In this last screen, you specify which ports will be mapped such that you can connect from the internet to your VM. As my company firewall blocks outgoing traffic on the RDP port, I map the RDP port to public port 443 (SSL). It can also be a good idea to add HTTP to this list, so you are able to use the SharePoint site from your browser without RDP.
Finish the Wizard, and your VM will be created. This can take some time, but in the meantime take the time to change the created storage settings.
Change storage to locally redundant.
Go in the Management Portal to Storage, and select the storage account which was created in the last step. Choose configure, and change Geo Redundant to Locally Redundant such that you will cut your storage costs in half (as it is only a dev test environment, I do not need my VM stored in two different locations). Save your settings.

Connect to your VM
Now your VM is up and running, as Azure starts it automatically. Keep in mind that you pay for the VM per minute from the moment it is running.
RDP to the machine with your cloud service DNS name (and think about the port when you changed it from 3389 to something else). In this example, that is ‘mysharepointfarm.cloudapp.net’. Login with the credentials you set in step 2 of the wizard. You’ll have a nice SharePoint machine at your fingertips: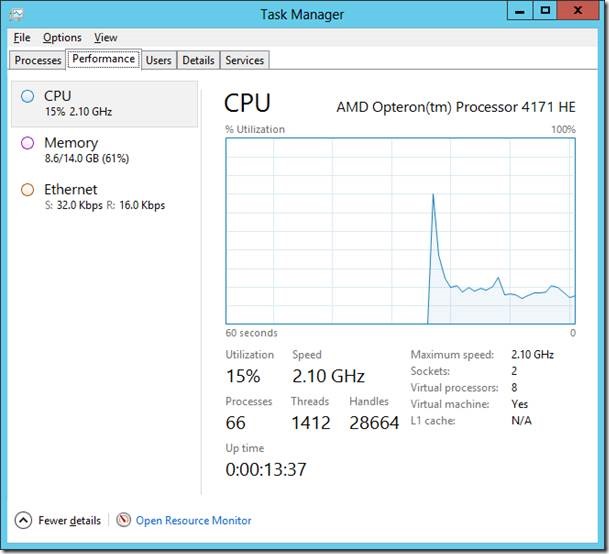
Create the farm
Your VM is started, SharePoint is installed as you see the icons of Central Administration and the product configuration wizard on the desktop, but there is no farm created yet. But on the desktop you find a shortcut to the Configure Developer Desktop. Inside that folder you find a Scripts map with three different scripts.
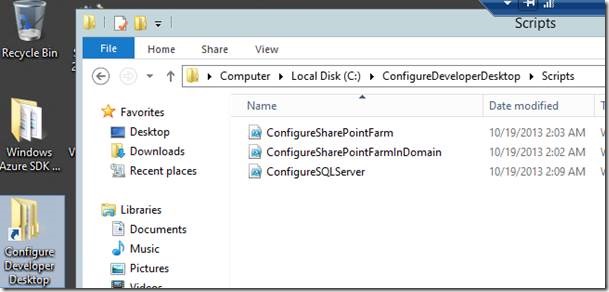 Start the PowerShell script ‘ConfigureSharePointFarm.ps1’ from the Shortcut found on the desktop to configure SQL and the SharePoint Farm.
This script will ask for a localSPFarmAccountName and a localSPFarmAccount password. It will create those accounts on the computer, configure SQL server, install a SharePoint farm and provision a developer site on http://localhost. This script will take some more time to run (I think it runs a complete SQL configuration on the background), so this is time to get some coffee. It will end with opening your newly created site collection.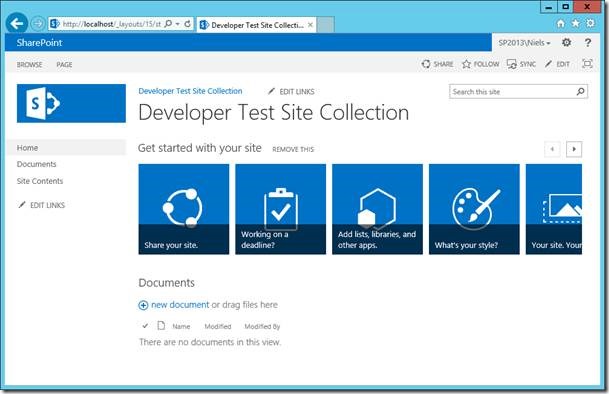
Costs
Again, keep in mind that you will pay your VM by the hour when it is running. So turn off your VM after use and power off the VM in the Management Portal when you’re done (otherwise your credits will be gone in a couple of days). I installed the Azure PowerShell tools, such that I can turn off your VM from my own computer with a simple Stop-AzureVM command.
As a Premium MSDN subscription will come with a monthly credit of €75, I estimated you can run your VM for about 175 hours.
| Storage, first TB | € 0.038 per GB per Month | 127 GB | € 5 per month |
| Transactions | | Per transaction | € 0.04 per hour? |
| Compute hours | MSDN rate | Per hour | € 0.36 per hour |
| Data Transfer, first 10 TB | € 0.09 per GB, first five free | Not much, but assume 15 GB | € 1 per month |
I’m not sure about how much transactions are used per hour. After two hours of usage, my bill was only € 0.02, so I estimate it on the safe side to € 0.04 an hour. So this means a €6 month fee, and a rate of €0.40 per hour.
Conclusion
When you are in the possession of a MSDN account, the SP2013 VM option is an excellent way to start developing and learning SharePoint 2013 without the need of expensive hardware. The other major benefit is that you have an environment up and running within the hour. You do not need to download or upload installation media, or install the bits yourself, which is a real time saver.


